Recycle Nature’s Bounty by Making Distinctive Papers
Homemade paper: the ancient Egyptians and Chinese made it, and now you can, too! Using a few household items and nature’s treasures — dried leaves, spent flowers, pine tags, even plant seeds and berries — you can create specialty papers that are unique and usable.
“Homemade paper is not for production, but for art,” said Richmonder Celeste Johnston, a botanical artist and illustrator who has taught papermaking since 2002. “Exquisite raw materials are transformed into creations that engage the heart and mind. It is magic.”
Johnston noted that once people experiment with paper making, they tend to get passionate about it. “Kids love it, too,” she said. “Making paper teaches them so much about ecology and being good stewards of the earth.”
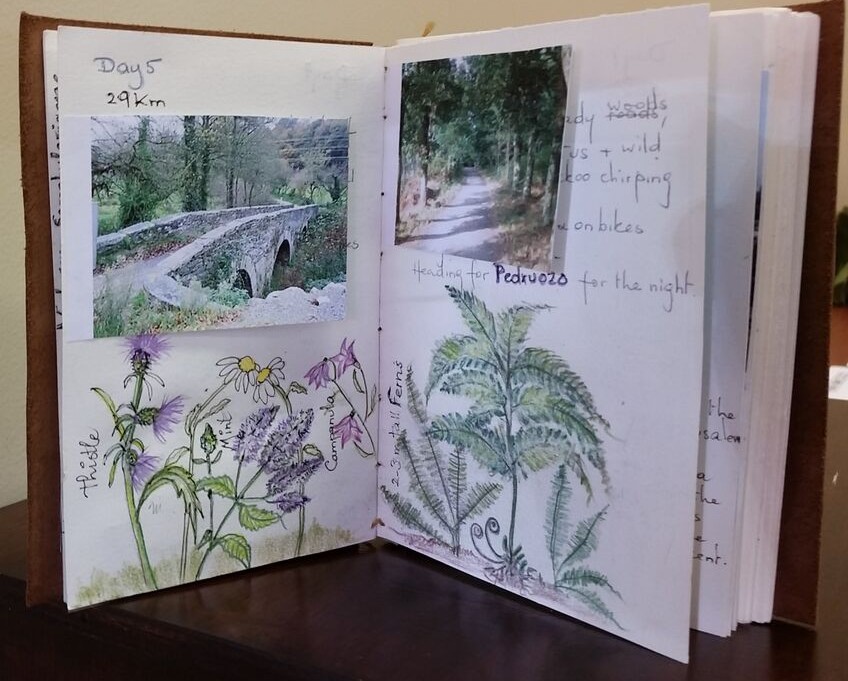
Handmade papers can be glued into accordion-pleated booklets and illustrated for use as distinctive journals and photo albums, such as this travel journal by Anne McCahill.
The resulting one-of-a-kind specialty papers can be framed and displayed as art, folded as greeting cards, compiled into scrapbooks and journals or used for wrapping wooden trays and gift boxes – all in time for holiday giving.
Following are simplified instructions. Additional resources with more in-depth techniques are available on line and in the Lora Robins Library at Lewis Ginter Botanical Garden.
Beginner’s Recipe for Making Homemade Paper
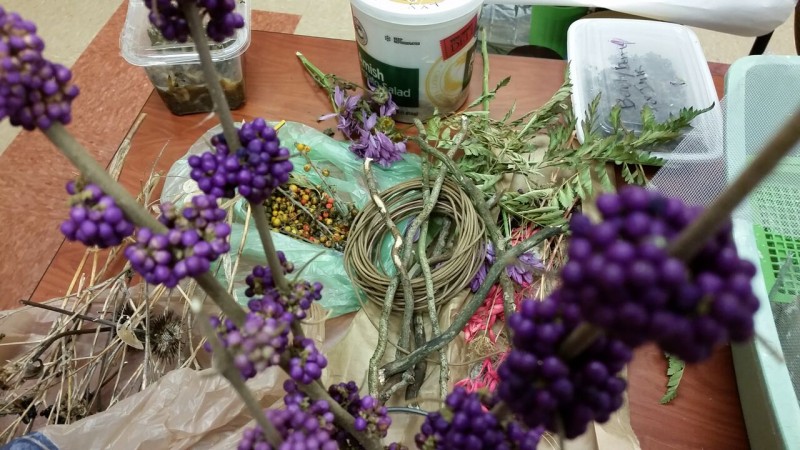
Paper color and texture are determined by the plants and plant parts used. Dried petals, seed heads and twigs may be added during the final stage of the paper-making process to further enhance visual appeal. Pictured: Callicarpa americana or beautyberry.
Materials:
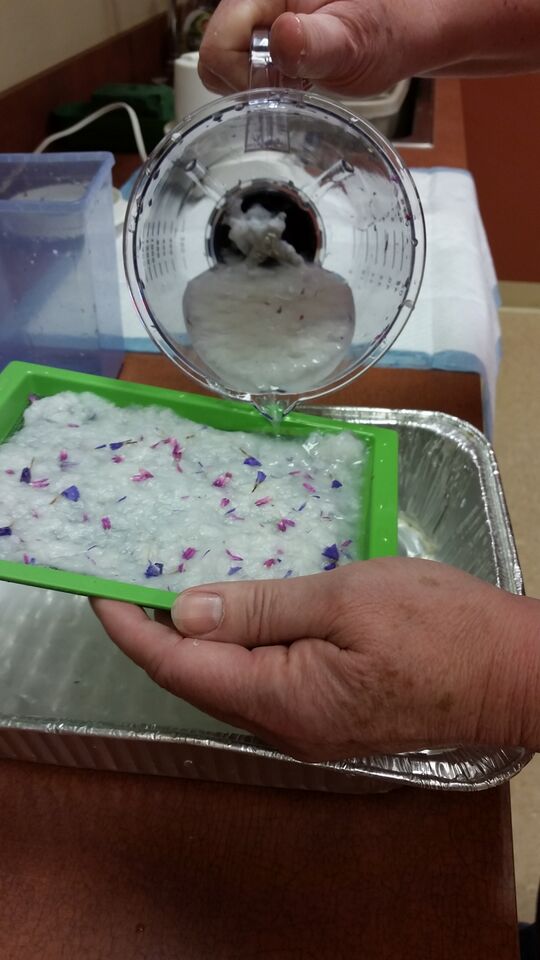
Pour the blended paper mixture over a mould-and-deckle unit and gently use a sponge to absorb and remove excess water
- Plant materials: dried leaves, herbs, seeds, spent flowers, berries, etc.
- Scrap paper: old bills, junk mail, envelopes, etc.
- Blender (not for reuse with food)
- Water
- Sponge
- Absorption mat: newspapers or puppy training pad
- Shallow pan or tub, large enough to hold paper molds
- Mould and deckle: from craft store or made by tightly securing window screen over an empty embroidery hoop (or small wooden picture frame) with larger corresponding hoop (or frame) fitting snugly outside it as a unit
Instructions:
- Gather plant materials, noting that fresh items tend to bleed colors more than dried items
- Rip scrap paper into one-inch by three-inch pieces.
- Place paper strips in blender until about half full, cover with hot tap water and allow to sit.
- Place shallow pan on a flat surface with absorption mat nearby.
- When blender’s papers are soft, pulse into a smooth, soupy mixture. Add small bits of flowers or other natural items as desired, testing different colors, designs and textures.
- Gently re-blend.
- While holding the mould and deckle combo over the pan with screen side up, slowly pour blended mixture onto screen until coated with thin layer of mixture. Lightly shake to even the coating and rid frame of dripping water.
- Place mould and deckle unit onto absorption mat, and use a sponge to absorb and remove excess water.
- Carefully remove outer hoop (or frame) and ease molded paper onto a dry piece of absorption paper. If paper sticks to mold, try sponging off more water.
- If desired, decorate with tiny pressed flowers, weed tips or twiglets, gently patting to embed them into the wet paper.
- Allow paper to dry thoroughly in a bright, dry area.
Editor’s Note: This article first published in the Richmond Times-Dispatch, in November 2015.