DIY Fish Decorations
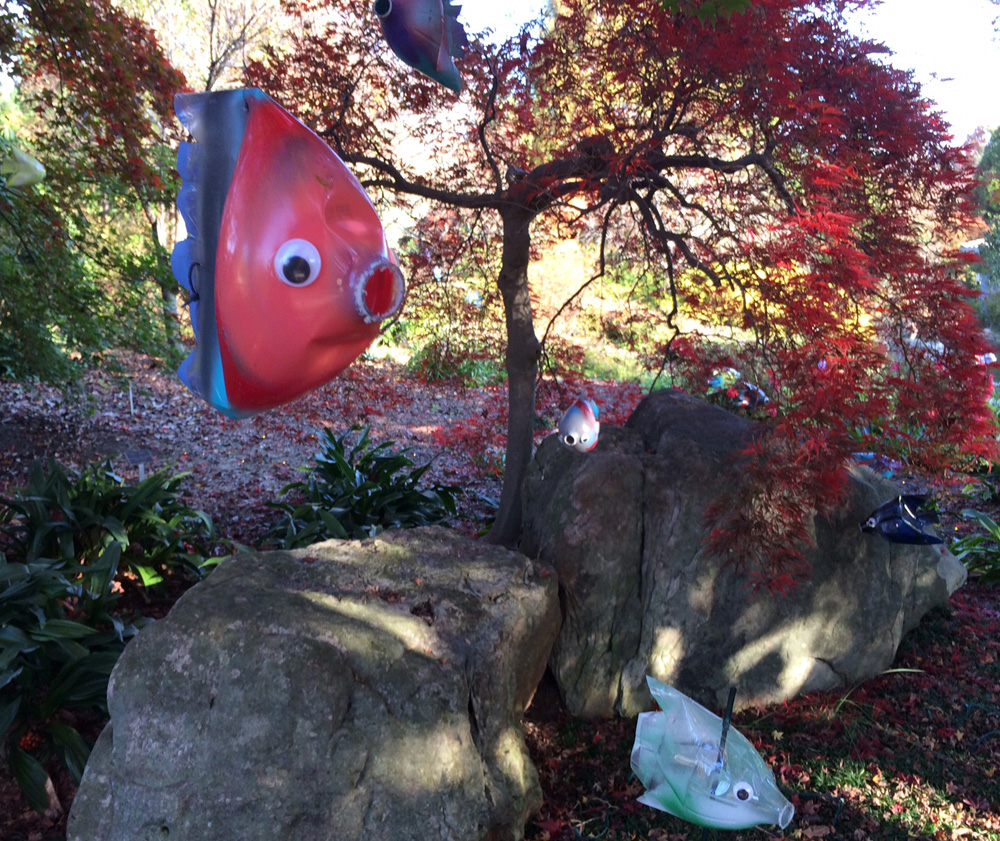
Bottle fish hanging in trees in the Upper Asian Valley
One of the most common questions we get at Dominion Energy GardenFest of Lights is “How do you make those creative decorations?”
It’s no secret that we are rich in talented staff and dedicated volunteers, both of whom have creative imaginations. We add in some hard work and a few ingenious ideas, and try to come out with something magical. Each year, we select our theme more than a year in advance and start the exciting process of planning. The theme has to be new, fun, appealing to all ages and cultures, and to top it off our goal is to tie the theme into our mission: education.
After we choose the theme (in case you haven’t heard, this year’s theme is H2Whoa!) we think of how we can make decorations for GardenFest using material that is sustainable or recyclable. This means that often we grow supplies that we’ll need to make our decorations. For example we grew gourds for the top of the tillandsia jellyfish in the Conservatory. When we can’t grow what we need, then the next best thing is to create something fun out of materials that have been recycled or donated. A few years ago, we provided step-by-step directions of how to make recycled soda bottle flowers using basic supplies and items you might already have on hand. Those were pretty magical, because not only were they beautiful, easy to make and inexpensive, they also could be attached to strands of lights. And since we are setting an environmental example for the community, not only are we recycling, but we are reusing decorations. You’ll find those soda bottle flower lights being reused this year in the Central Garden.
With this year’s water theme, we decided fish, octopuses, and jellyfish would be the perfect ambassadors for our message about what you can do at home to help keep our waterways healthy. We are thrilled that our (do it yourself) DIY bottle fish decorations that we just put up this week are already a hit. I’ve watched school groups visiting the Garden on field trips squeal in delight when they see the bottle fish swimming from our trees. We have 150 bottlefish swimming outside in the Asian Valley. In the Conservatory we have another 125, including four schools of different types of fish. Here is the step-by-step process of how you can make these DIY soda bottle fish decorations at home. We hope you have fun making them! We sure did.
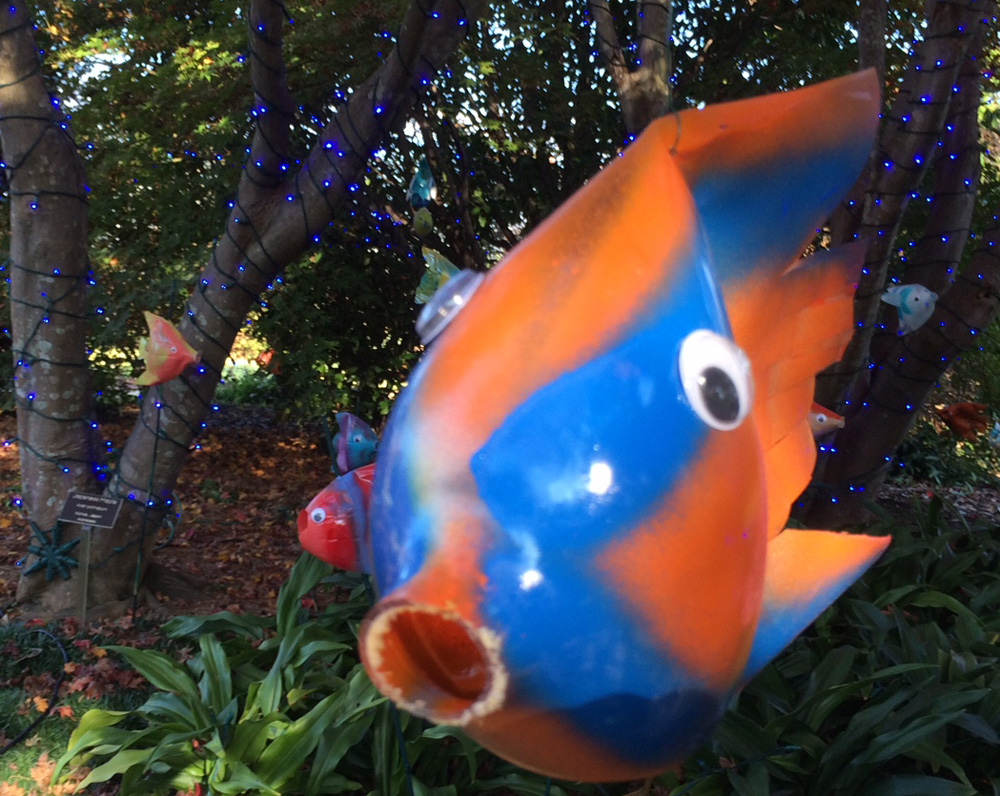
This orange and blue fish is showing its Wahoo spirit.
Bottle Fish
Materials
- a 1- or 2-liter soda bottle
- scissors
- fishing line (and/or bamboo stakes)
- spray paint
- a hack saw (optional)
- goggles or eye protection to use when sawing or cutting
- staples, zip tie or wire to tie fish
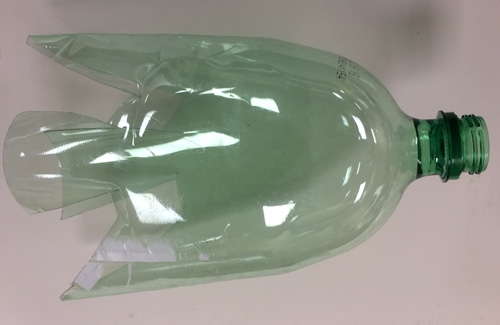
This green soda bottle gives a good example of what your fish will look like after you flatten the back and cut two notches for the fins and tail of the fish. Next step: stapling the tail.
Directions
- Score and remove label. Cut off the end of soda bottle; start with an Exacto knife and then finish cutting with scissors.
- Determine what you want your fish to look like. Consider the size of the body and the shape of the tail and fins. Make some “guide dots” with a permanent marker to help. Make a dot where you think the staple or tie should go too.
- Using the half with the bottle neck, hold onto the bottle neck and compress the open side so that it is flat in the center. Squish the bottle as flat as you can to just above the dot for the staple but do not crease the outer edges.
- Staple or zip tie back of fish to hold tail in position, and so you can define the fins.
- Make the appropriate cuts with scissors to shape the body, tail and fins. Cut 2 notches out of the open side of the bottle, these create the back and side-fins. (Don’t forget your safety goggles!) Make your initial cut by going through both layers of the bottle (flatten the bottle in that specific area) then finish by cutting the layers singly.
- “Unsquish” the bottle if necessary to shape the body. You may need to stick a long object like a pencil into the inner cavity of the fish to push out an area that is mashed in.
- Using a saw, cut off the screwing part of the bottle neck. This creates a more realistic fish mouth. (Don’t forget your safety goggles!)
- Paint or spray paint the bottle in a fun pattern or fish design, and add eyes with glue gun if desired.
- Poke a hole in the top back of the fish to string with fishing line so you can hang it from a tree so it can “swim.” Or, if you prefer, you can use bamboo stakes and “plant” them in your garden.
Special thanks to Garden Volunteer Debbie Guckert who helped create our how-to guide (and many, many fish!)
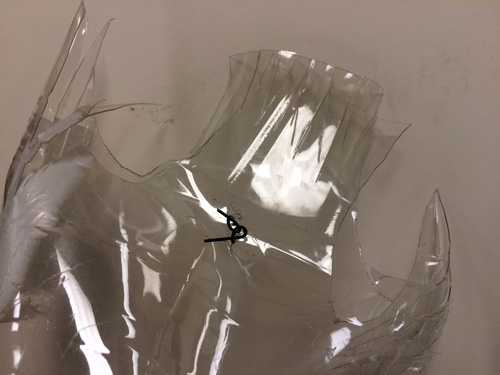
You can see for this fish we used a piece of wire to attach tail closed. You could also use a heavy duty stapler. Notice this fish has feathered fins and tail for a more realistic look.

Diagram of how to make cuts and dimensions of cuts for making 1- and 2-liter “bottle fish.” Note, Coke bottles have a different shape, so diagram varies. Drawing courtesy of Garden Volunteer Debbie Guckert.

This blue and green bottle fish has a bamboo stake and is “planted” in the Garden.