Worms! How to Make a Wormery
Last week we talked about how worms can build healthy soil. It’s an amazing and complicated process that these small earthworms take to transform our soil.
Wouldn’t it be cool if we could see worms at work underground in the soil?
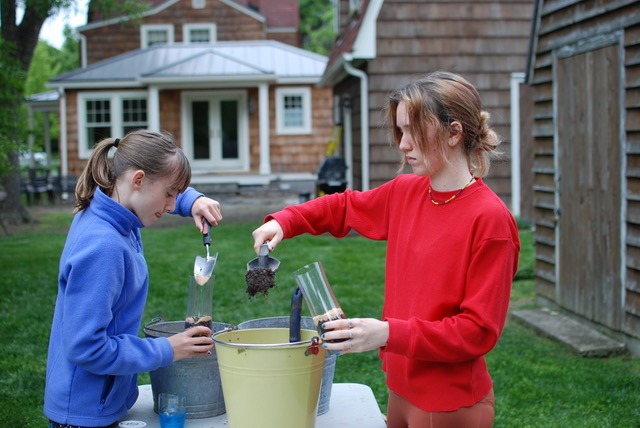
Well, maybe we can. I’m going to show you how to build a wormery with a plastic bottle, some soil, some sand, and some old leaves. It’s easy!
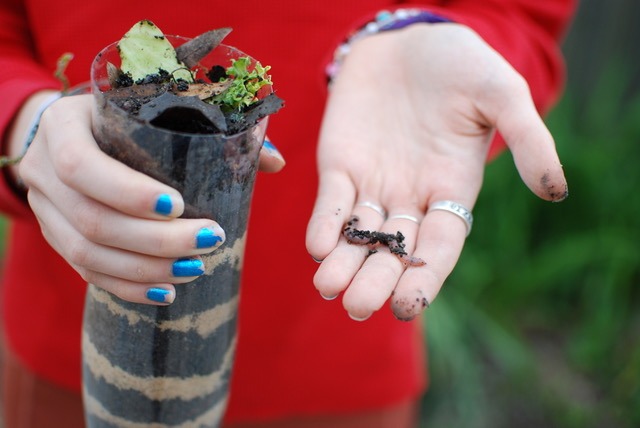
Of course, you will also need some worms. Look under old logs, rocks or potted plants. Sometimes you can find them at the bottom of a pile of leaves. They like to hang out where it is moist. When you find them, gently extract them from the soil with a trowel, or you can just pick them up. Just be careful not to hurt them. Try to find about 10 worms.
Making a wormery is a fun family project.
Here are the instructions for your temporary wormery:
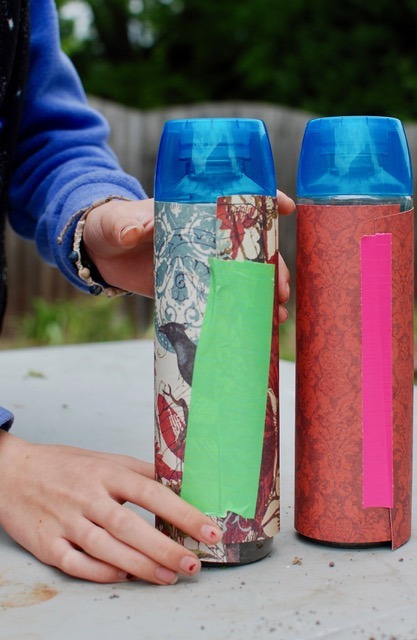
1. Cut off the top of a plastic bottle – any type will work. You can also use some other type of clear container if you do not have a plastic bottle.
2. Alternate layers of sand and soil. It is not an exact science, but make the layers of sand about a half-inch and the layers of soil about 2 inches. You will see these layers will disappear as worms burrow around. If you do not have sand, you can just use soil from your yard and still have fun watching the worms tunnel. Add enough water to make your wormery moist, but not soaking. Rainwater is best if you have it. Add old leaves and/or vegetable scraps to the top. Finally, add your worms.
3. Cover the outside of the wormery with paper so light can’t get in. You can also place the wormery in a dark shed or closet. Worms are very sensitive to light. They much prefer the dark.
4. Ask yourself these questions. You can write down your predictions if you would like! We’ll try to find the answers.
- Will the worms like living in the wormery or in the earth better?

Don’t forget to add the worms!
- Will the worms eat the leaves and compost items?
- Will the worms grow?
- Will the worms change in some other way?
- Will the worms multiply?
- Maybe you have some questions of your own to study and research?
5. Observe your worms for a bit each day. Look to see if they are tunneling horizontally or vertically. How fast are they eating the leaves and vegetable scraps on the top?
6. When you are done observing, release the worms back where you found them. The fun part is dumping out the wormery to get a good look at the worms again. You never know how they may or may not have changed.
Here are some additional things that you can observe about earthworms:
Be sure to cover your wormeries with paper. Earthworms don’t like light.
Physical adaptations:
• Segmented bodies with tiny bristly hairs (setae) help worms move through the soil.
• The long, streamlined shape of a worm helps it to wiggle through narrow burrows and around rocks.
• Circular and long muscles work together to help worms move.
Behavioral Adaptations:
• Earthworms secrete mucus which helps them move more easily through the soil
• Earthworms move away from light so they do not lose moisture through their skin. They come to the surface to eat in the early morning and sometimes at night
Clitellum:
• This is the raised lighter-colored band that circles the body of the worm. An earthworm forms a cocoon for eggs in its clitellum. In a year, an earthworm can produce many cocoons containing multiple eggs.
Anterior and Posterior Ends:
• The anterior end of the worm is the end that is closest to the clitellum. The worm’s mouth is on the anterior end.
• The posterior end of the worm is the other end – which is the end where waste is expelled.
Not all earthworms are the same
There are numerous types of earthworms. Identifying them can be overwhelming, but putting them into three categories and explaining how they are named and what they do makes it easier. See if you can tell what kind of worms you have.
First, there are the worms that live “upon the earth.” The Greek word for this type of worm is epigeic. These worms live in compost or places with lots of rotting vegetation on the surface of the soil. They eat fresh decomposing material quickly. They tend to be red and stripy. Some people call them red wigglers, bloodworms, or tiger worms.
Second, there are the worms that live “within the earth.” The Greek word for this type of worm is endogeic. These worms live mostly live within the top one or two feet of soil. They eat organic material that is already beneath the surface and mixed with the soil. They burrow horizontally through the soil. They are usually pale gray, or pale pink.
Third, there are the worms that come “up from the earth.” The Greek word for this type of worm is anecic. These worms create vertical burrows; however, their primary food source is decaying matter on top of the soil. They feed on leaves that they drag into their burrows. They burrow up to 6 feet deep! They are dark red or brown. They leave their castings on top of soil outside of their burrows. The piles they leave are called middens. The nightcrawler is classified at anecic.
Did you have fun making your wormery? What did you learn? We’d love to you tell us what you learned in the comments!